How to enable Hyper-V
1. Control Panel -> Programs and Features - > click Turn Windows features on or off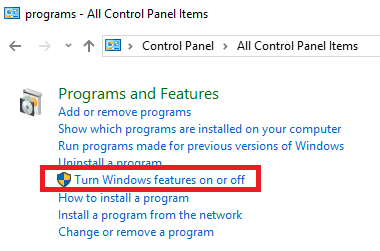
2. Find the Hyper-V option, and select “Hyper-V Management Tools and Hyper-V Platform”
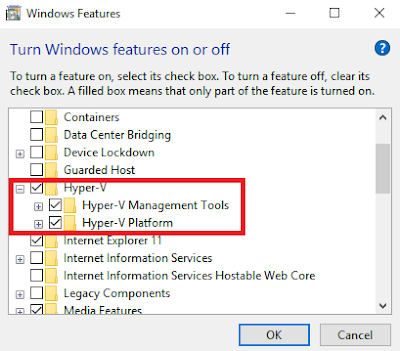
3. Once you click “OK”, you need to restart your computer to apply the changes.
How to create virtual machine through Hyper-V
It can be divided into two parts:1. Virtual switch (for network accessing)
2. Virtual machine
Create a virtual switch
1. Hyper-V Manager -> Virtual Switch Manager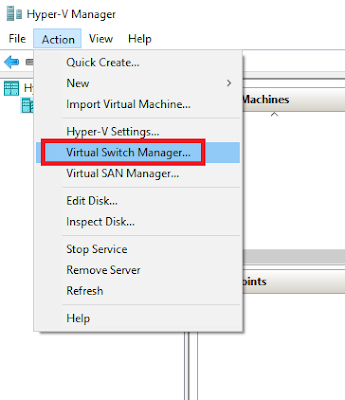
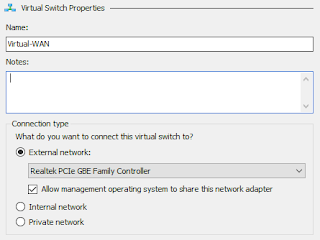
2. In order to let the virtual machine able to access network, we need to select External option. Then click “Create Virtual Switch”

3. Enter the name you want, and select the “External network”
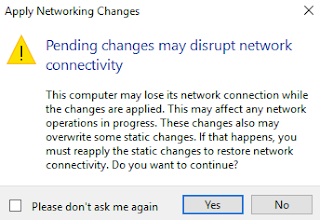
4. Click “OK” for the alert message
Creating a virtual machine
1. Action -> New -> click “Virtual Machine…”
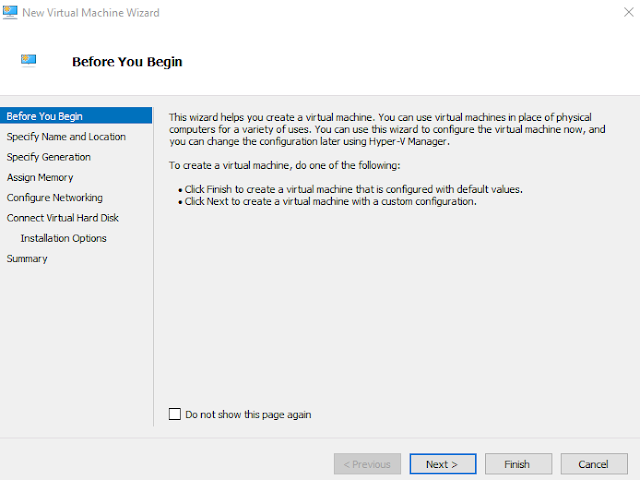
2. Then you will see the following window to know what this wizard for, and select “Next”
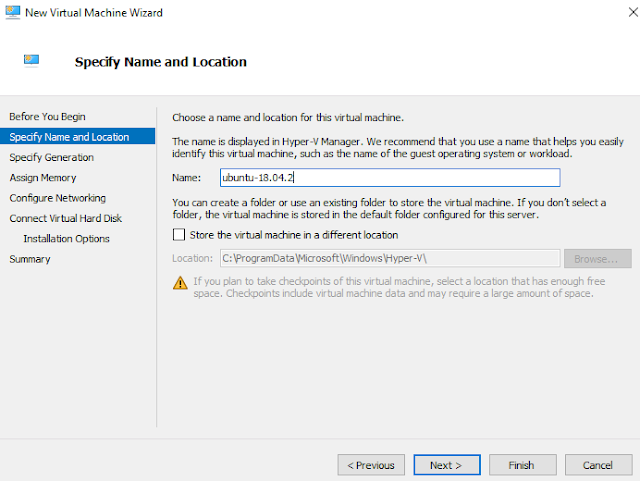
3. Choose a descriptive name for your virtual machine. Also, you can change the location to store the virtual machine
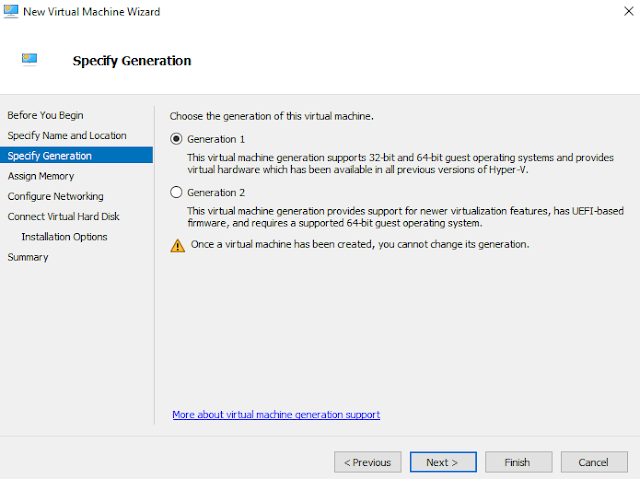
4. Then select a generation which is based on your computer
5. Assign memory to this virtual machine. This assigned memory should be considered with your real memory and the operating system you want to install. (for example, Ubuntu need at least 2G)
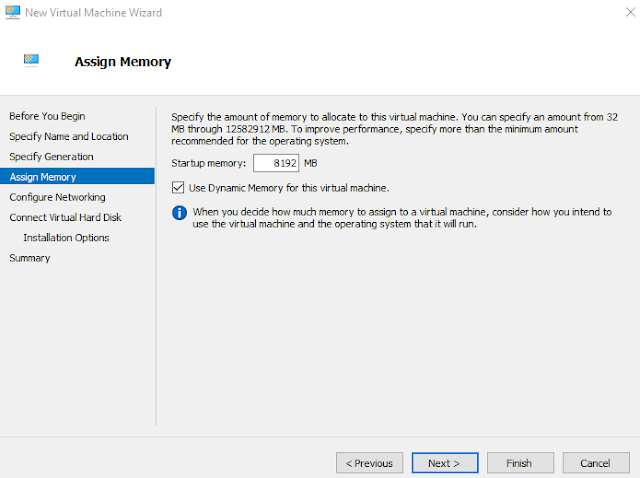
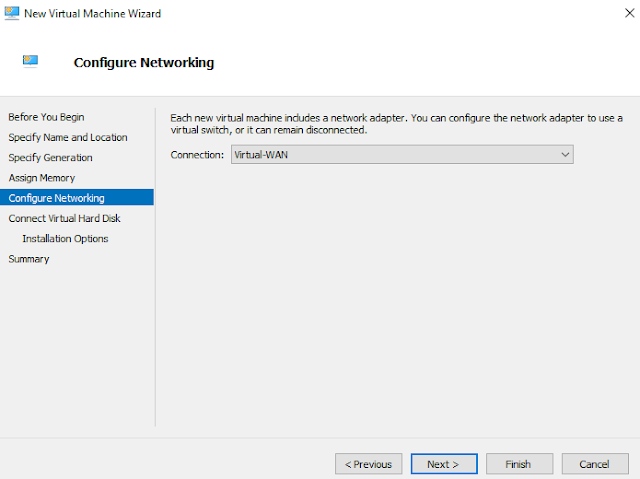
6. Now, select the virtual switch we created before
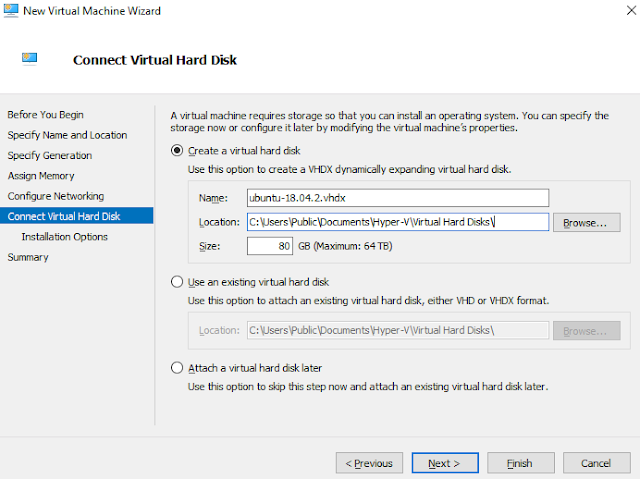
7. Setup the virtual hard disk. (Ubuntu needs 25 GB)
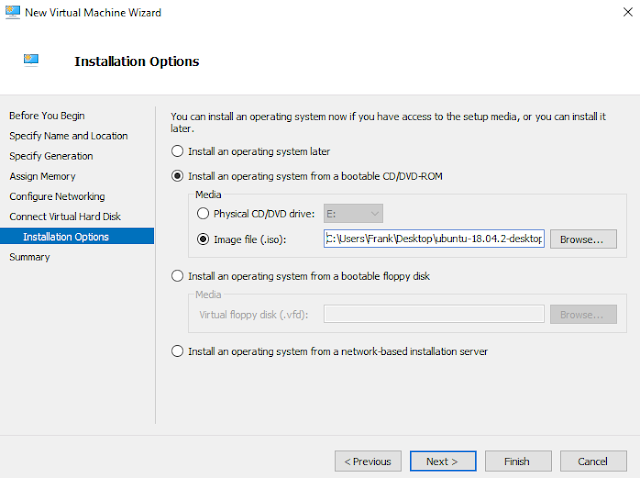
8. Installation options. From this experiment, I have download an Ubuntu Image from https://www.ubuntu.com/download/desktop. Therefore, I select the image file option.
9. Summary
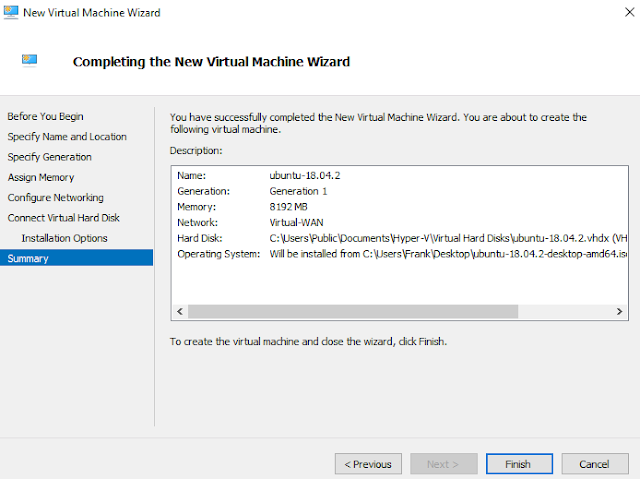
10. After that, once you connect to this new virtual machine, the installation wizard of Ubuntu will be launched.
Install Ubuntu
1. First, select a language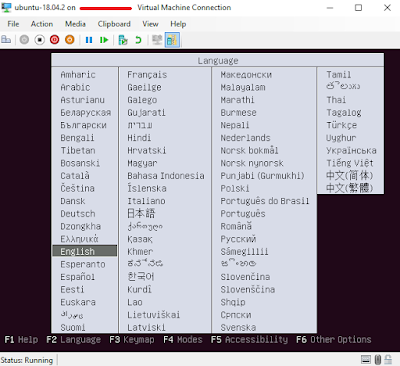
2. Then, select “Install Ubuntu”
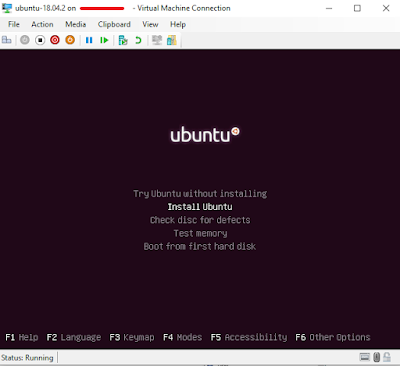
3. Then follow the installation steps to select the language and keyboard
4. On “Updates and other software” steps, you can select “install third-party software for …”
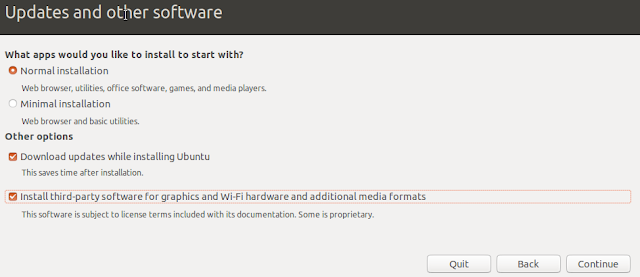
5. On “Installation type” steps, select “something else”

6. Then double click “/dev/sda” and you will see the pop-up confirmation modal. Click “Continue”


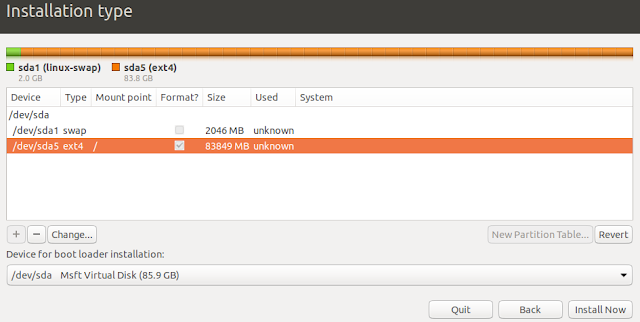
7. Then you can see we have the “free space” option from this device, then double click it to split part of them to be the “swap area”
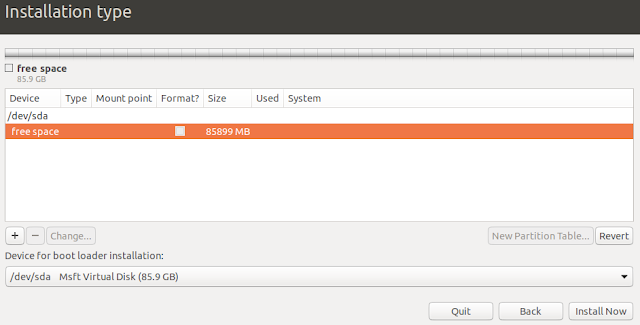
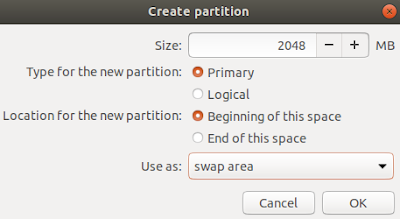
8. Then double click “free space” again to make the remaining space to be Ext4.
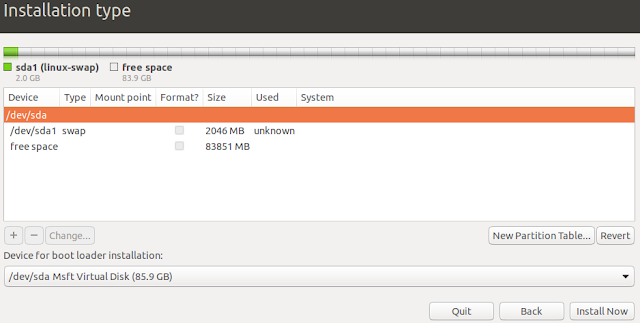
Select / from the drop-down list
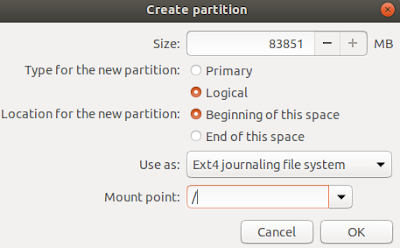
9. Select “ext4” and click “Install Now”. Also, click “Continue” from the pop-up confirmation modal.

10. Select area and enter your login credential. Then, virtual machine will start to install it based on the previous setting.
No comments:
Post a Comment