This note will illustrate how to do it step by step.
Preparation:
We will use tables and relationships which were built by the following link: Many-to-Many Relationship in ServiceNowDemonstration:
1. Open “Database Views” list
Application Employer -> Input “Views”, then select “Database Views”
2. Then, create a new “Database View”
Click “New” button
Input some descriptive name, label, and Plural.
For example: I entered “Students to Classes Relationship”
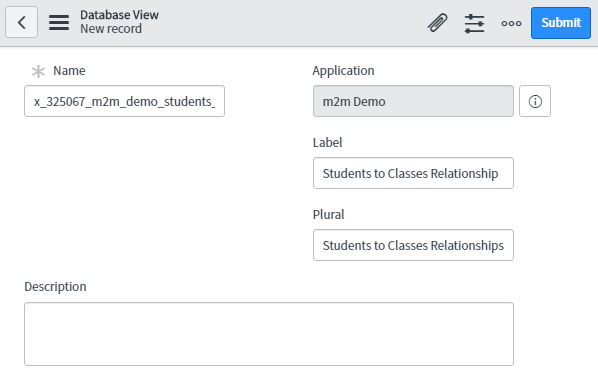
3. Save the new “Database View”
Click left-top “Additional Actions” icon and select “Save”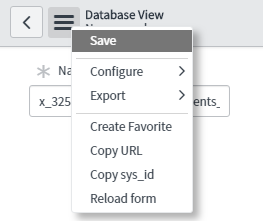
4. Then we can start to create “View Table” on this “Database View”
On the bottom of the new “Database View” we created, click “New” to generate “View Table”
The first “View Table” will be the root table. Therefore, we will leave “Where clause” to be empty.
Also, I set “enrollment” as “Variable prefix” which will be used later to representative which table.

5. After creating a new “View Table”, you can setup which fields will be returned.
Click “New” to create “View Fields”
6. Go back to “Database View”, start to create the second “View Table”.
Set the order a little bit higher than the root table. Also, take a look of “Variable prefix” and “Where clause” to see how I join this table to the root table. You might notice that we use “Variable prefix” to differentiate the table if they have the same field name.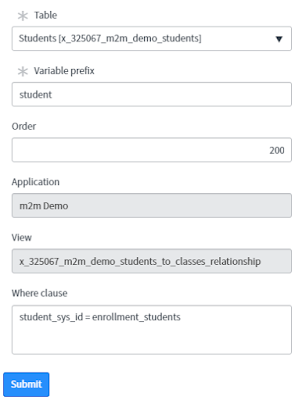
Also, you can customize the field from the source table.

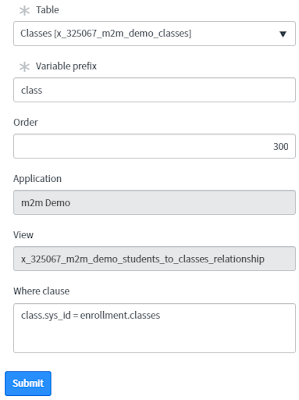
Customized fields.

Also, click “Update personalized list” button to customized the list view.
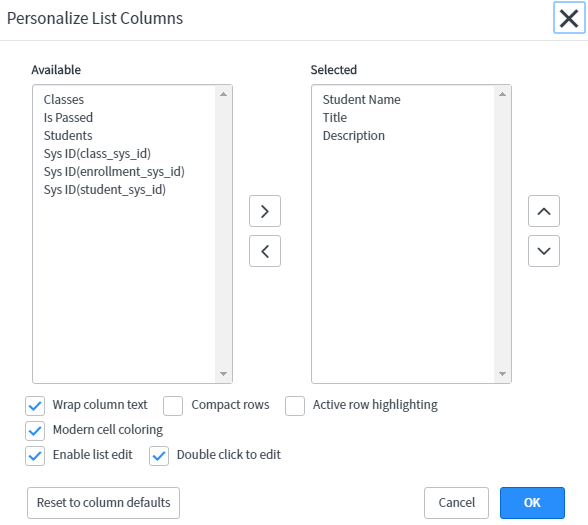
The “Available” fields will be those fields we specify to return for each “View Table”.
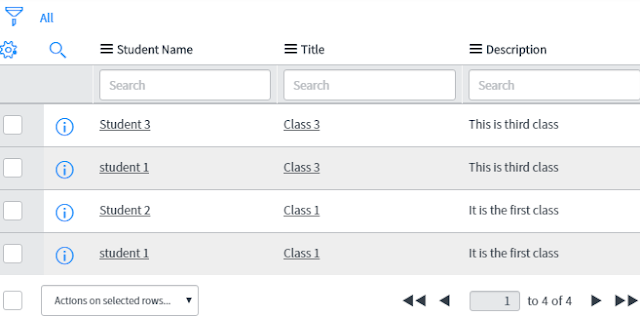
Then the result will be shown like the following picture.

Then paste the following code to the script area.
var gr = new GlideRecord ('x_Yours_m2m_demo_students_to_classes_relationship');
gr.query();
while(gr.next()) {

7. Create the third “View Table”

Customized fields.

8. After that, let’s test it.
Click “Try It” to see the results on “Database View”.Also, click “Update personalized list” button to customized the list view.

The “Available” fields will be those fields we specify to return for each “View Table”.
Then the result will be shown like the following picture.

9. Also, we can test it in “Scheduled Script Executions”
Go to Studio -> Create Application File, and select Scheduled Script Execution
Then paste the following code to the script area.
var gr = new GlideRecord ('x_Yours_m2m_demo_students_to_classes_relationship');
gr.query();
while(gr.next()) {
gs.info("Student ({0})\t => Class ({1})\t",
gr.getValue('student_student_name'),
gr.getValue('class_title'));
}


No comments:
Post a Comment