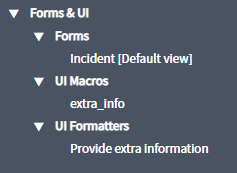
Below is a demonstration steps-by-steps.
1. First, we need to create a new app for this demonstration
Open “Studio” -> “Create Application”
-> select “Start from scratch”, and enter your application name.
2. Second, we need to create an “UI Macro” to define the content which will be used by “UI formatter”
On studio, click “Create Application File”,
and select “UI Macro”
3. Then, we need to create an “UI formatter” which need to point out which “UI Macros” it will use.
On studio, click “Create Application File”, and
select “UI formatter”
Note that, the field of “Formatter” should be
the name of “UI Macros” you want to use, and end with the “.xml”
4. In the end, we need to add the defined formatter to the form view we want to change.
On studio, click “Create Application File”, and
select “Form” -> Create
In this demonstration, I select “Default View”
of “Incident [incident]” and add the formatter we created to it.


No comments:
Post a Comment