1. Outbound REST message
2. Scripting REST Message
In Server Side Script, we can directly use “new sn_ws.RESTMessageV2()” to generate REST Message object without creating “Outbound REST Message” in Studio. But it is not handy to test and debug it. In contrast, “Outbound REST Message” provide an easy way to test it and show it in build-in GUI. It can shorten our development time.
Therefore, in this demonstration, I will focus on “Outbound REST message”.
Preparation
1. Generate a new instance in ServiceNow for this demonstration2. Go through the pages of Postman Echo to understand how to send REST request to it. We can take advantage of “Postman Echo” to test our REST clients directly, instead of building our own Web Server.
Demonstration
HTTP GET
1. In ServiceNow Studio, click “Create Application File” button on the top, and select “REST Message” and then click “Create”
2. Fill the form’s Name, Description and Endpoint.
Set “Endpoint” to “https://postman-echo.com/get?foo1=${foo1}&foo2=${foo2}”. You can refer to the "Postman Echo" website. Also, select “Authentication type” as “No authentication”
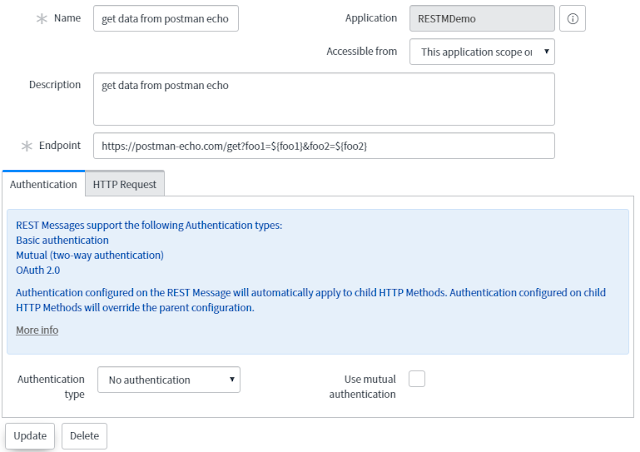
3. Once you save it, the default HTTP methods (Default GET) will be generated automatically. Click it to edit. You can change the name of it if you want.
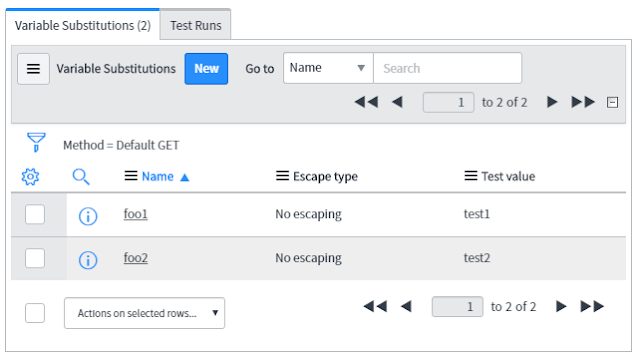
4. Continue the previous step, click “Auto-generate variables”. Then, you will notice that two new records inserted in “Variable Substitutions”. In order to use Outbound REST Message’s test function, set the “Test value” for those variable substitutions.
5. Click “Test”, then you will see the REST testing result.
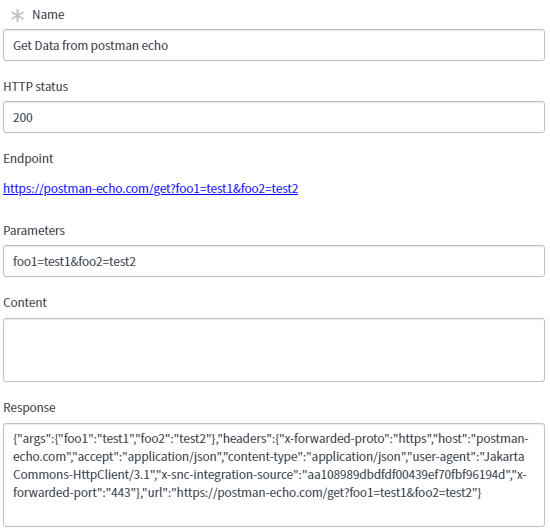
HTTP POST
1. In ServiceNow Studio, click “Create Application File” button on the top, and select “REST Message” and then click “Create”2. Fill the Name, Description and Endpoint.
Set “Endpoint” to “https://postman-echo.com/post”. You can refer to the "Postman Echo" website. Also, select “Authentication type” as “No authentication”
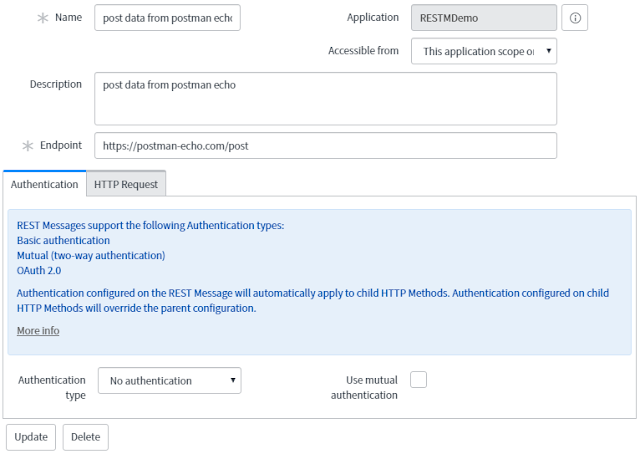
3. Once you save it, the default HTTP methods (Default GET) will be generated automatically. Click it to edit. Change it to “Post” in HTTP method field.
4. Continue to the previous step, insert “accept” and “content-type” with “application/json” value. Also, fill the Content field as the following picture.
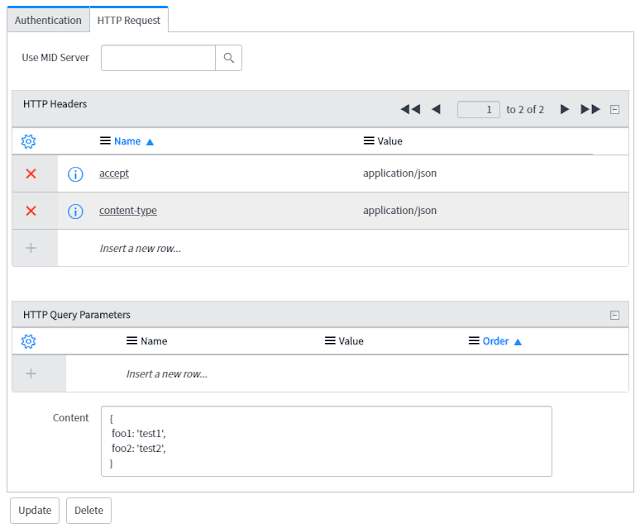
5. Click “Test”, then you will see the REST testing result.

No comments:
Post a Comment